

INSTALLING ORIGINAL CLICK
BEFORE YOU BEGIN
All recommendations and instructions should be followed in order to ensure a successful installation.
Read the full PDF for more detail.
Ensure that the style, color and construction are correct.
Visually inspect product from different production lots for slight variations. Slight variations in gloss may be visible with mixed lots.
Inspect all planks before installation to ensure there are no damaged or defective planks.
Store all cartons of flooring on a flat surface in neat stacks in order to prevent warping. Boxes should never be stored on their sides.
Leaving the cartons closed, let standard vinyl flooring acclimate in a horizontal position for 48 hours prior to installation. While acclimation of stone core vinyl products is not required, installation of the floor covering should be in a controlled environment with operational heating and air conditioning.
This product should be installed after all other trades (with exception of baseboard installation) have completed work, in order to prevent damage to the product.
Cabinets should not be installed on top of the flooring.
Ensure that the subfloor is suitable for installation, including being free from cracks and high or low areas which may affect the performance of the flooring. All necessary corrections should be made before installation begins. Read the PDF for more information about specific subfloors.
Measure the room to determine the width of the last row of planks. If the width is less than 8 mm (3"), the width of the first row of planks should be cut accordingly.
Remove all existing trim before the installation of the product. As this is a floating floor, nails should never be used during the installation of planks. Care should be taken to ensure that no nails penetrate the flooring when the trim is put back on.
In order to ensure good blending of the pattern and best overall look, open multiple boxes at the same time and sort the planks by visual inspection before they are installed.
It is recommended that during the installation that a periodic visual inspection be done to make sure there is a good mix of plank patterns.
HELPFUL HINT
First try clicking together a few pieces while examining the profile in good light. This will help you understand how the pieces fit together and will make it easier for you to install your final floor.
RECOMMENDED TOOLS AND MATERIALS
Utility knife and replacement blades
Measuring tape
T-Square
Straight edge
Pencil/marker
Spacers
Rubber mallet
Tapping block
Table saw or jigsaw (for installing stone or rigid core products only)
Safety glasses/goggles
Dust mask
Floor patch (if necessary)
INSTALLATION
FIRST ROW

Start in a corner by placing the first plank with the tongue side facing the wall.
Use spacers around the perimeter of the room, as well as against any fixed objects, to maintain expansion space. The PDF has more information about the minimum expansion space required for different applications.

Insert the end tongue of the second plank into the end groove of the first plank at an angle of approx. 15–20°.
When lowered, the plank will click into place with light pressure.
Repeat this procedure for each subsequent plank in the first row until you reach the last full plank.

Rotate the last plank 180° with the pattern side upward and place it beside the first row of planks. Lay a ruler, draw a line and cut.
Rotate the plank 180° so that it is back to its original orientation. Insert the end tongue into the end groove of the previous plank at an angle of approx. 15–20° and lower into place.
It is important to ensure that the planks in the first row are straight before beginning installation of the second row.
Use a rubber mallet and tapping block to lightly tap into place.
WARNING: FAILURE TO PROPERLY LINE UP THE END JOINT AND ATTEMPTING TO FORCE IT IN WHILE OUT OF ALIGNMENT WILL RESULT IN PERMANENT DAMAGE TO THE END JOINT.
NEXT ROWS

You will begin the next row with the off-cut piece from the previous row to stagger the pattern.
Consult the PDF for more information about minimum length and joint offsets. Adjust layout for a balanced look.
It is faster to assemble planks into a new row at the ends and then attach the entire row to the previous row on the long sides.
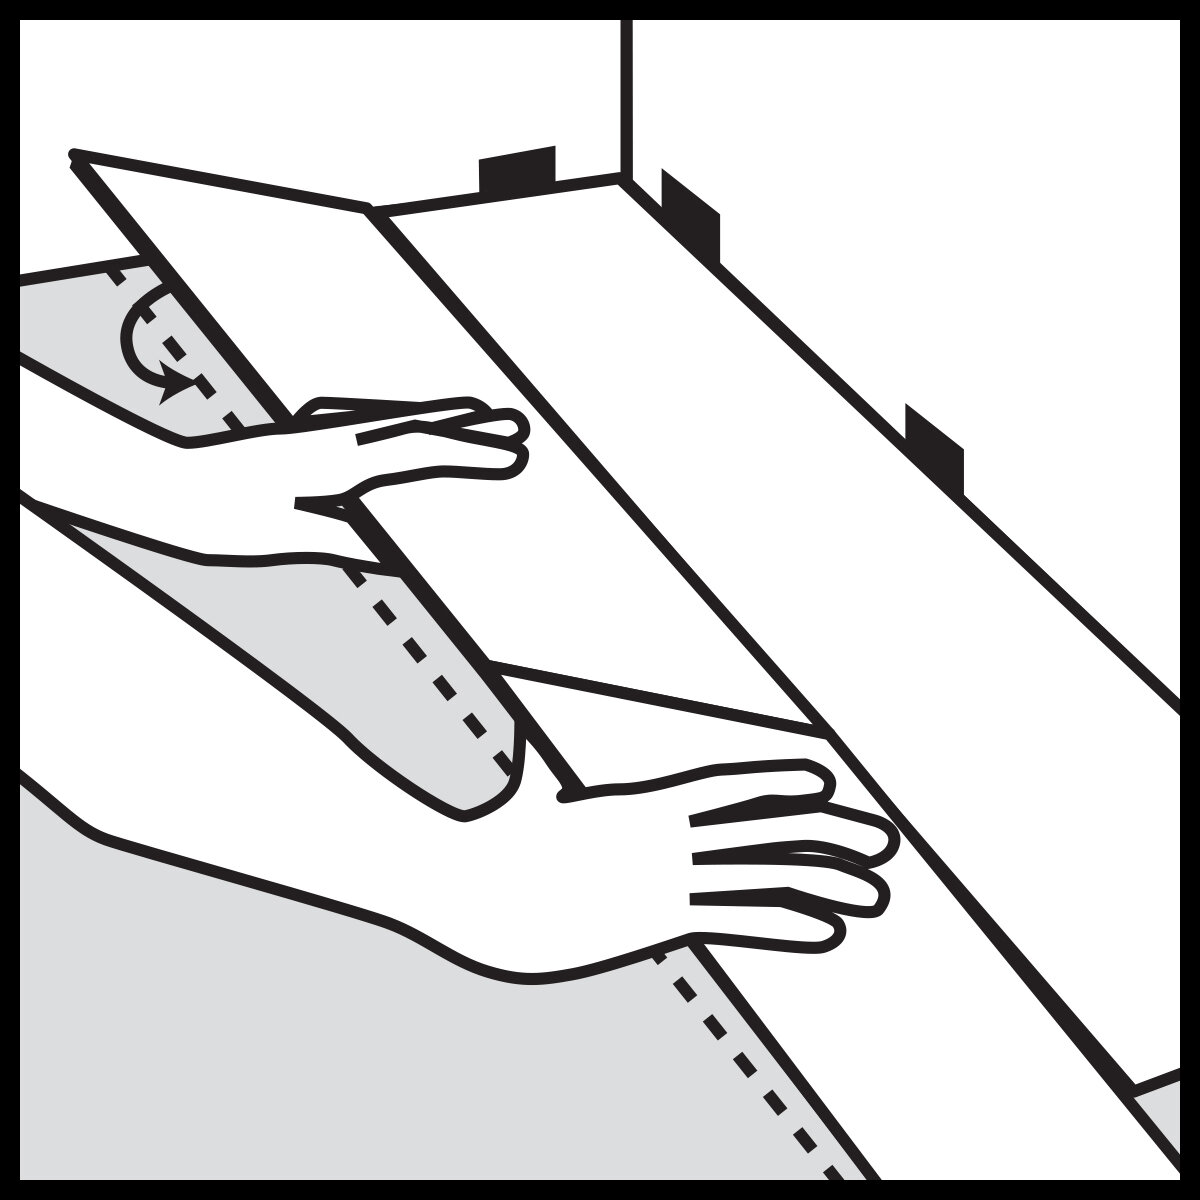
To start your second row, lay your first plank on the subfloor. Insert the end tongue of the second plank into the end groove of the first plank at an angle of approx. 15–20° and lower. Continue assembling the planks this way until you have your second row complete.
To attach the second row to the first row, tilt and push the side tongue into the side groove of the first row at an angle of approx. 15–20 degrees. Use a rubber mallet and tapping block to lightly tap into place.
Continue laying remaining rows in this manner.
LAST ROW
To fit the last row, lay a plank on top of the previous row with its the tongue to the wall. Lay a ruler, draw a line, cut and attach.
Don’t forget to allow room for spacers!
Continue laying remaining row in this manner.
DOOR FRAMES AND HEATING VENTS
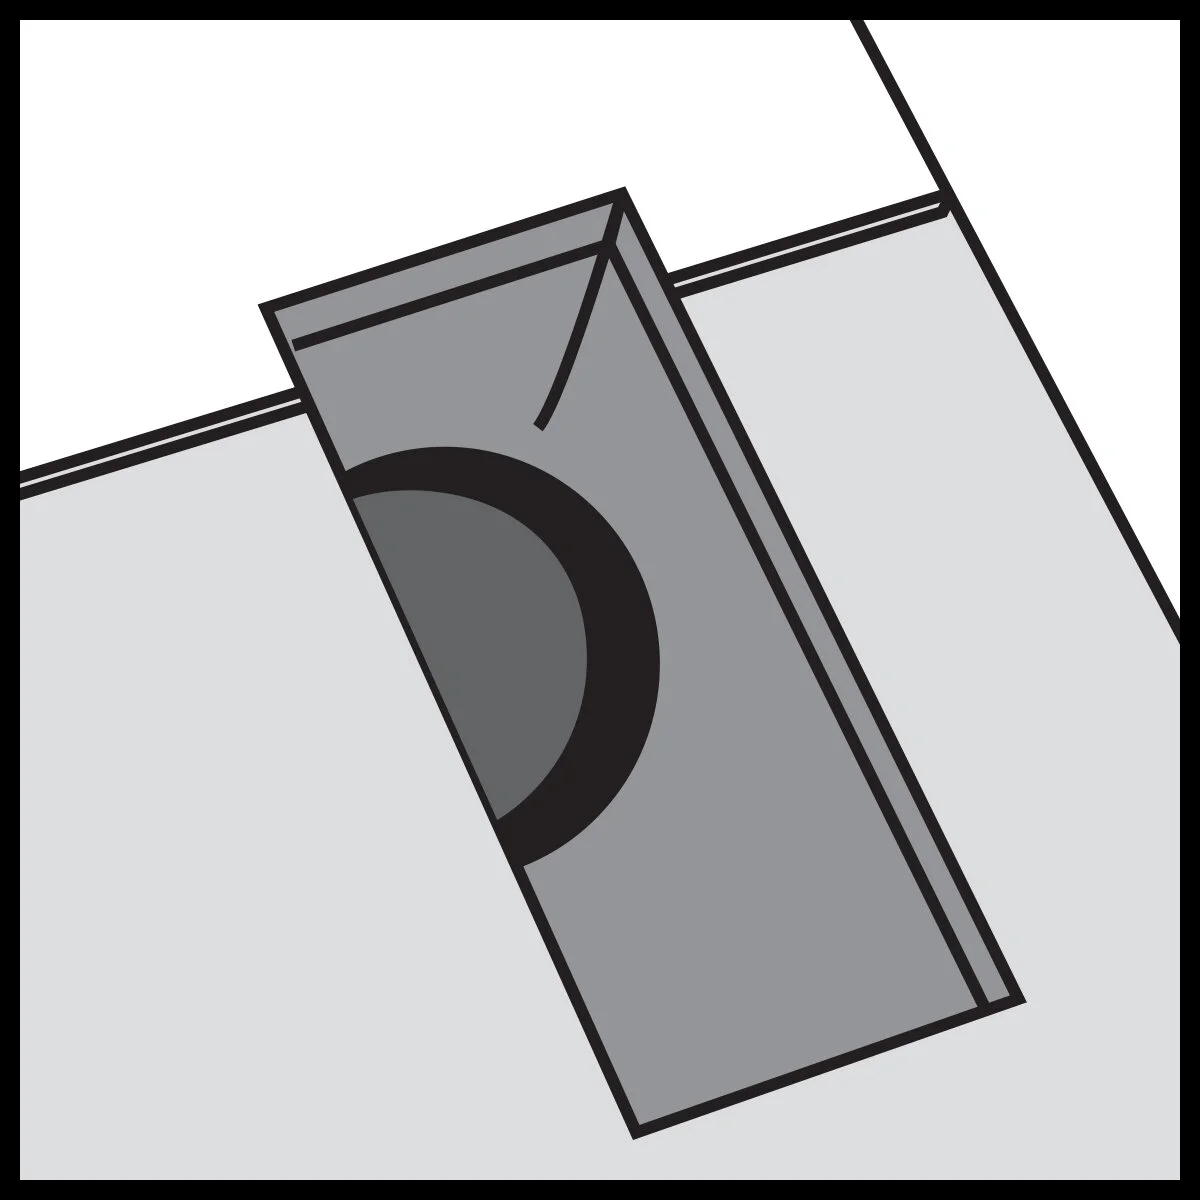
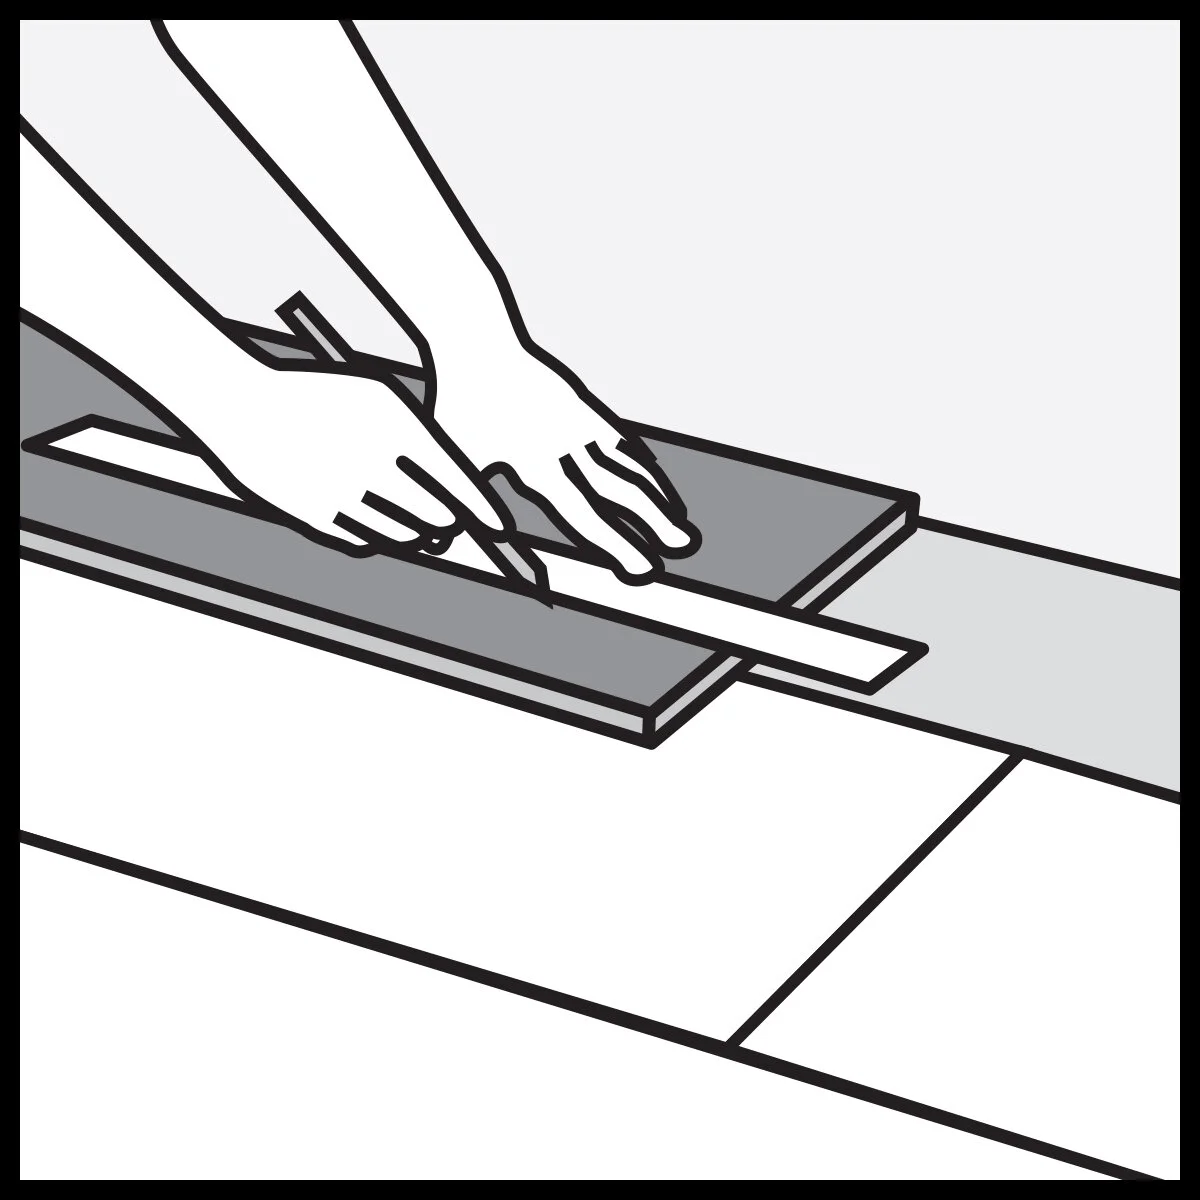
First cut the plank to the correct length. Then place the cut plank next to its actual position.
Measure and mark the areas to be cut out. Cut out the marked points, allowing the necessary expansion distance on each side.

You can trim for door frames by turning a plank upside down and using a handsaw to cut away (undercut) the necessary height so that planks slide easily under the frames.
Make sure to leave the necessary expansion space.
Remove the spacers once the floor is completely installed.
WATCH THE VIDEO

CARE AND CLEANING
Our guide to keeping your vinyl flooring clean and making sure it lasts as long as possible.

WARRANTY
Our our vinyl products are covered by industry standard warranties.
MORE QUESTIONS?
Read our Frequently Asked Questions About Vinyl Flooring